How to Wire a Light Bar | Installation of LED Light Bars
Wiring up an off-road light bar to your vehicle can be an intimidating task. However, if you follow the right steps, it can be pretty simple. Here are the four steps you should follow to make it work for you:
-
Attach the LED light bar to your vehicle.
-
Connect the harness to power the light bar.
-
Connect your wiring harness to your battery.
-
Test the light bar to make sure everything works.
These are pretty simple, but there's a lot of info and tips to make this smooth and easy for you. Let's break down these four steps and make this as easy as possible.
Before we dive into the instructions, here are some of our reviews and buying guides if you're in the market for a new light bar.
Step 1: Attach the Light to Your Vehicle
The first step is to mount the light bar to your vehicle. Think carefully about where you want it to go, especially if you are using lights with multiple placement options. Pod lights and smaller light bars can go in almost any desired location. Double check all your measurements before you drill. A pencil is great because you can erase it and make changes as you want.
What You'll Need
Light bar brackets make this step much easier, if you have them. Black Oak LED sells light bar kits that come with brackets. If you bought another light, we also sell many different LED light brackets that will work for most light bars.
You may need a drill with a metal drill bit as well. If your vehicle already has holes in the engine bay for the power wire, then your life is a little easier. But you will probably still need your drill to attach the LED light bar brackets.
Life might be a little easier with a flashlight, especially if you're under your vehicle or working near the bottom of the engine bay.
Instructions
After you've determined where on your vehicle you wish to mount your LED light bar, the first step is to get it secured. Use the screws and washers that came with your mounting bracket to attach the light to the bracket, then attach the bracket to your vehicle using the second set of screws and bolts. Unless your vehicle is pre-drilled, you may have to drill holes where you wish to attach your light. Measure the positions of the holes on your bracket and then drill holes that match those positions on your vehicle. After you have the holes in place, simply tighten the bracket and light down.
Pro Tips
Before you drill holes in your vehicle, use double-sided tape to get your positioning just right. Attach the brackets to the light bar, then use double-sided tape on the end of the bracket to stick it to your vehicle. Take a few steps back and make sure it looks the way you want.
Step 2: Connect the Light, Relay, and Switch Inside Your Vehicle
The next step is to connect the wires from your light to the relay switch inside your vehicle. Of course, you want to be able to turn your lights on and off easily, so the switch inside the cab is a must.
What You'll Need
You will either be installing and working with your own wiring harness or you will get connected to the vehicle's wiring harness. You might even do both!
Shrink tubing or electrical tape will be useful to make sure all the connections, such as the ground wire and positive wire, are insulated and waterproof. Shrink tubing is better for waterproofing while electrical tape has better abrasion resistance. Use both if you can.
It's far better to use a relay and light switch instead of wiring directly into the switch from the battery. The relay is designed to carry a higher current and is less likely to fail or overheat in use.
Wire strippers may be useful if the ends of your wiring is not already stripped to the correct connection length.
Instructions
Once you have your LED light bar firmly secured to the mounting bracket and the mounting bracket firmly secured to your vehicle, it is time to start connecting the wiring. Start by running the wires from the light bar to the relay switch. Connect the red wire from the light to the red wire on the switch and the black wire from the light to the black wire on the switch. For these connections, it is recommended that you either solder the wires together or connect them using heat shrink butt-connecters. After the wires are connected, cover any exposed wiring with electric tape or heat shrink tubing to prevent the risk of the light shorting out or starting a fire.
Pro Tips
Be sure the connections from the lights to the wire harness, switch portion, and relay are secure and waterproof.
If you're new to soldering and making these connections, check out this introduction to soldering video. It's a simple and accessible guide to soldering.
Step 3: Hook the Relay Up to Your Battery
Next up is connecting the relay to the car battery or vehicle's power source. Hopefully, you positioned the relay so that running this wire is pretty simple. You will want to use a fuse, whether that's in the vehicle's fuse box or by adding a fuse holder to the wiring harness.
What You'll Need
All the same tools as the last step. There isn't a lot different here.
If you need one to add a fuse, you're going to need the fuse holder to be installed on the red wire, or positive wire.
Instructions
Once the light bar and the relay switch have been properly connected, you will want to route the red and black wires from the relay switch to the battery of your vehicle. Connect the red wire from the relay switch to the positive battery terminal and the black wire from the relay switch to the negative terminal of your battery. Make sure that these connections are solid and secure.
Pro Tips
The red wire is always going to go to the positive terminal. But the black wire could be a ground wire to your vehicle. If this is what you're doing, then ring terminals on the end of the wire make for a cleaner installation.
Step 4: Test and Enjoy
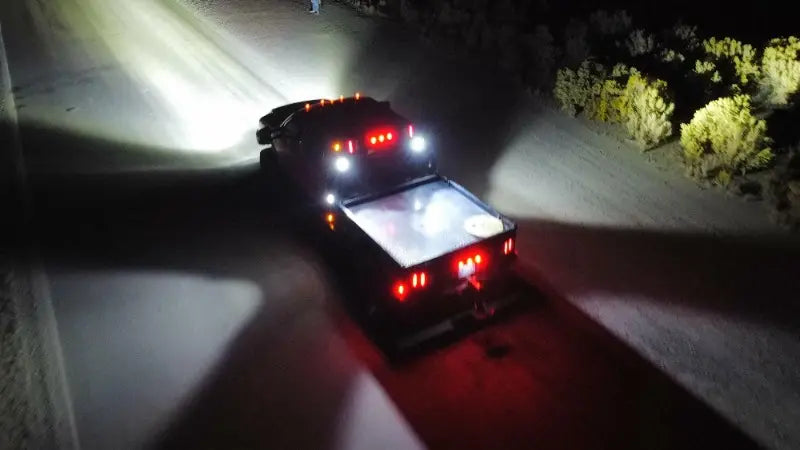
Now that you are all hooked up, it's time to test and make sure that your LED light bar is working like it should. Remember to not stand directly in front of your light as you are turning it on in order to avoid the risk of eye injury from the light. Test that the mounting is sturdy by applying appropriate force to the mounting bracket and making sure that there is no wobble. Once you have ensured that your light is mounted sturdily and that all the wires are properly connected with no exposed wiring, it is time to go out and enjoy your brand new LED light bar!
LED Light Bar Wiring Diagrams
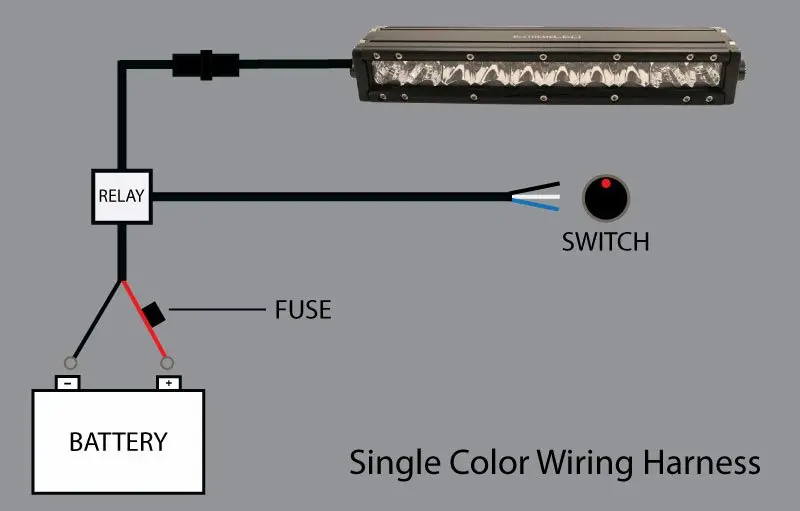
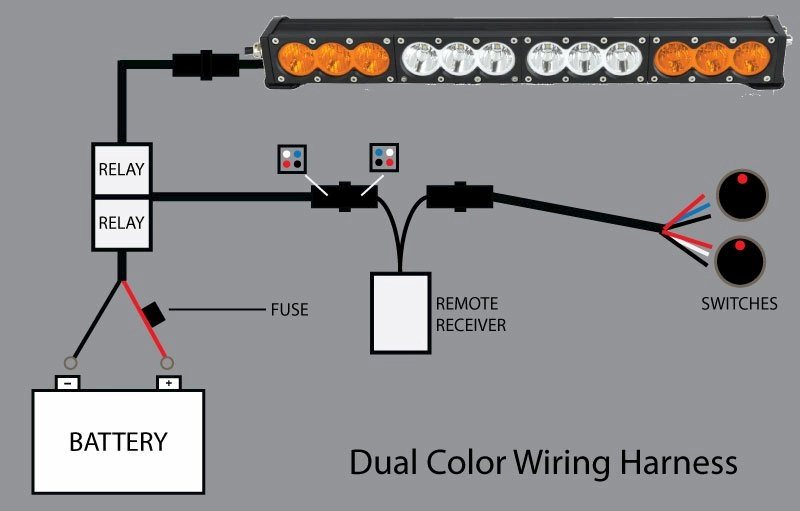
If you look at these pictures, you can see there are options for more control over your lighting. You could install a remote receiver instead of having a dash switch. Whatever components you choose, make sure every connection is secure and all the connectors are waterproof.


